Set up your workspace: where to start
A step-by-step path for the person who bought Skovrum, from your first sign-in to your team's first class.
Your words may differ. Each workspace can choose its own words: a class might be a cohort, program or group, a learner a participant, trainee or new hire, a session a module or lesson. These guides use the default words. The steps are the same whatever your workspace calls them. Change your workspace's words
You've bought Skovrum, or someone has set up a workspace for you. This page takes you from your first sign-in to a workspace your team can use, in the order that saves the most work. Each step links to a full guide.
You'll be doing this as an Admin, the role with access to everything. Most steps happen in Manage: click More at the bottom of the sidebar, then Manage.

1. Sign in for the first time
Your invitation email has a link to set your password. It works once, for seven days. Then sign in at your workspace's address. See Accept your invitation.
A new workspace isn't empty. It comes with two ready-made courses, survey templates, competencies and a few tags, so you don't begin from a blank page. See What's in a new workspace.
2. Work through the setup checklist
On Today you'll find Set up your workspace, a checklist of five steps. It's only shown to Admins, and only until you finish or hide it.
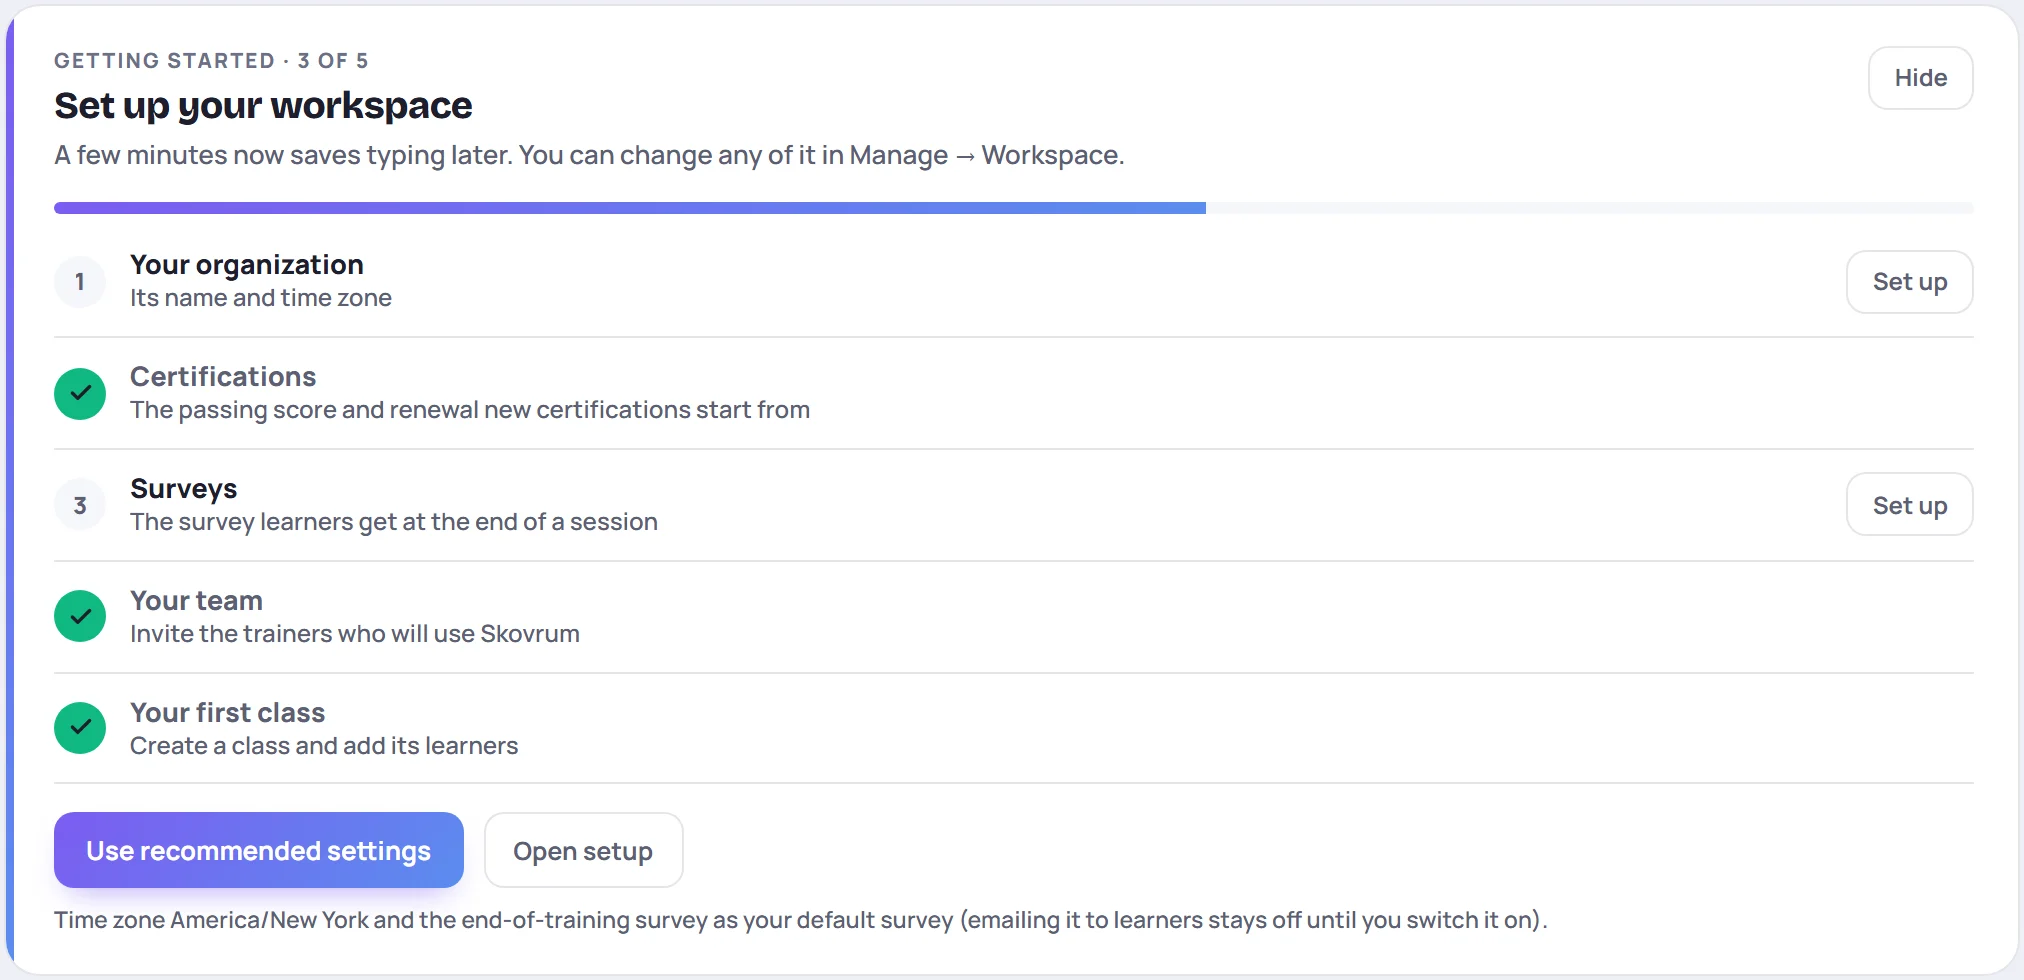
The checklist lives on Today, but you do each step somewhere else. Its button takes you there:
| Step | What it sets | Its button opens |
|---|---|---|
| Your organization | Your organization's name, which shows under the Skovrum logo, and its time zone. Class times and the daily email follow the time zone. | Manage → Workspace |
| Certifications | The passing score and renewal period every new certification starts with | Manage → Workspace |
| Surveys | The survey learners get at the end of a session, and whether it's emailed to them | Manage → Workspace |
| Your team | Inviting the trainers who will use Skovrum | Manage → Users |
| Your first class | Creating a class and adding its learners | The new-class form |
Steps tick themselves off as you do them, wherever you do them.
Two buttons help you move fast:
- Use recommended settings fills in the first three steps in one click: the time zone of your computer, an 80% passing score with no renewal, and a ready-made end-of-training survey. Emailing that survey to learners stays off until you switch it on.
- Open setup takes you to Manage → Workspace, where the same settings live for good. See Workspace settings.
Choosing these settings takes a few minutes. Inviting your team and creating your first class take longer, so the checklist waits for you to come back to them. When every step is ticked, click Finish setup to put the checklist away. Hide puts it away early; Show it again in Manage → Workspace brings it back.
3. Use your own words
If your team says program rather than class, or participant rather than learner, change the words now, before anyone else signs in. See Your workspace may use different words.
While you're in Manage → Workspace, decide whether you train people for several clients, sites or business units. If you do, switch on Clients and business units so each class can belong to one.
4. Fill in your catalog
The catalog is the shared lists every class draws on. Filling it in before you create classes means trainers pick from lists instead of typing. All of it is in Manage → Data:
- Courses: reusable plans for classes you run again and again. See Courses and past classes.
- Certifications: what learners can pass, with pass marks and renewal periods. See How certifications work.
- Competencies: the skills you rate in observations. See Competencies.
- Survey templates: the questions learners answer. See Build a survey template.
- Tags, and countries if you need them. See The catalog.
5. Invite your team
Go to Manage → Users to invite trainers and anyone who only needs to read. Each person gets an email with a link to set their password. See Invite users.
Give each person the role that fits:
- Admin for anyone who should manage users and settings, like you.
- Trainer for the people who run classes.
- Supervisor for leads who need to see everything but change nothing.
Your plan decides how many people can write and how many read-only viewers you can add. See Seats and read-only viewers.
6. Create your first class
Click Classes in the sidebar, then New class. Starting from a course fills most of the form for you. See Create a class.
7. Check your plan
Manage → Workspace also shows your plan, how many seats you're using and what your plan includes. See Plans.
After that
Once your team is up and running, a few Admin jobs are worth knowing about:
- Backups: download an encrypted copy of your whole workspace.
- The audit log: who changed what in Manage. Team and Business plans.
- Announcements: a message on everyone's Today screen. Team and Business plans.
- Branding: your own logo and colors. Business plan.
Then hand your trainers Your first week as a trainer.